Project-based functionality will only be available if you have created a project framework in your programme settings and enabled it within your year group settings. Read more via Configuring & Enabling Project-based Learning
Overview
Via the Year Group > Projects
Via the Language Portfolio > Proposals on your year group page, you can access the Projects roster. Click on any student's name to access that student's Project Worksheet. The Project worksheet contains a portfolio of project documents, deadlines, and notes.
Students can enter or edit a topic by clicking Edit Proposal on the top right of the worksheet.
After choosing the Language, Phase and Goals, the student can select a Project Advisor from the Advisor menu and click Save Changes to submit the proposal for review.
Notes:
1) Only teachers who have been added to the system will appear on this list. Project Supervisors can also be assigned in bulk via the Year Group's Members. Read more via Assigning Project-based Learning Advisors
2) If certain subjects are not appearing under the language dropdown menu, see Selecting Your subjects, Options, and Levels.
After clicking Save Changes, students can view upcoming Project deadlines and To-Dos.
Deadlines and To-Dos
via the Language Portfolio or Calendar
You can create deadlines by clicking Add a New Deadline under the Language Portfolio or Calendar.
- Enter basic details (name, date, & time)
- Link the deadline to your Project. Note: It is not possible to link a deadline after it has been created, so it's importing to link at this time.
- Enable Dropbox to allow students to submit their documents through ManageBac+.
- If you Enable TurnItIn, submitted coursework will be filtered through TurnItIn automatically.
- If you choose to Attach Files, they will be available when the student's access the deadline.
- Once you have clicked Add Deadline, the deadline will appear on the calendar.
You will need to add at least one To-Do item to ensure the deadline will appear on the student worksheet. You can assign To-Dos to students, advisors, or everyone. If you assign a To-Do to students only, advisors will not be able to check them off (and vice-versa for students).
Deadlines will appear on the student Project worksheet. To-Do items can also be reviewed and added via the Worksheet.
You can also review the status of your students from the Language Portfolio. The default view displays a list of the students assigned by the advisor with key information such as Language, Phase, Mode of learning, goals and status (Needs Approval, Approved and Complete).
To view progress against a specific deadline, you can switch to the Deadlines view. This will allow you to see where each of your students stand relative to the global deadlines that have been set (e.g. submitting an outline, meeting with the advisor, etc.).
Uploading Project Documents
Reference documents can be uploaded under the Documents section. If your account has been integrated with Google Drive, you will see the option to upload documents directly from your Google Drive account.
Notes & Interviews
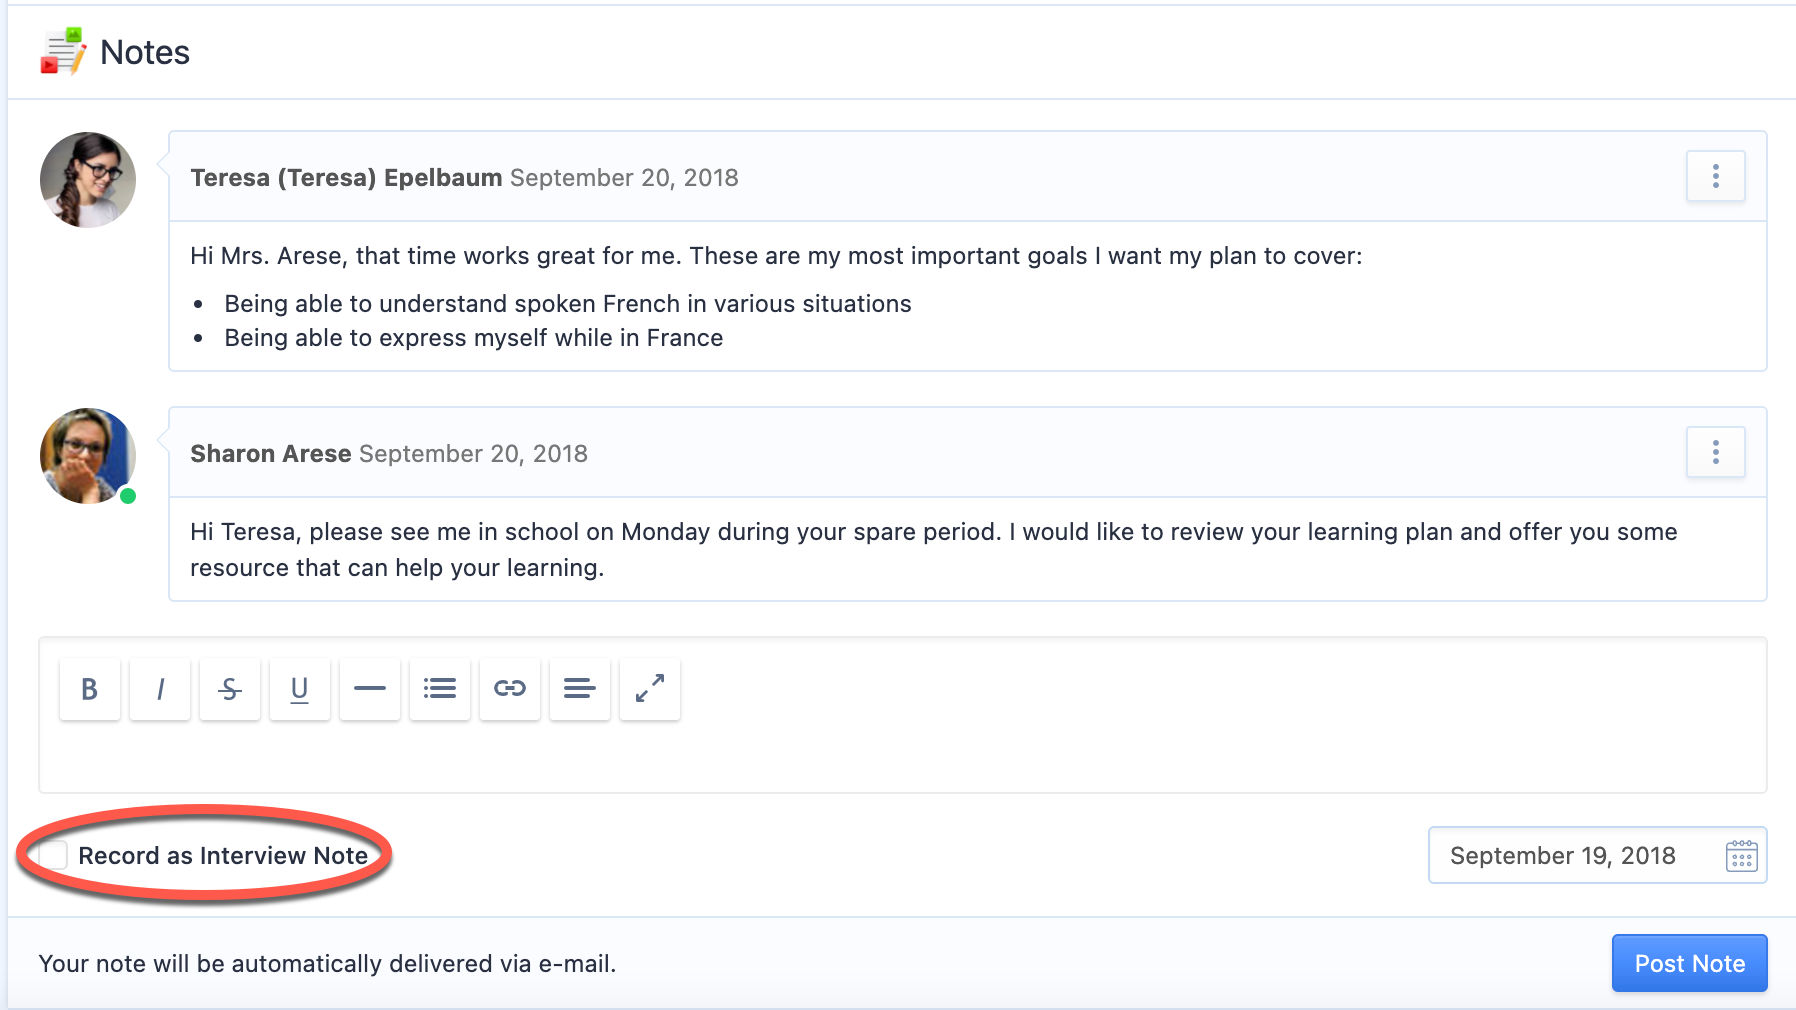
In the Notes section, you can leave messages for students to which they can reply. This is ideal for posting comments and scheduling meetings. You can also leave Interview notes, which are visible to staff only by default.
After selecting your advisory student from the Projects roster, you can scroll to the bottom of the worksheet to record an interview note. By ticking the Record as Interview Note checkbox, your note will be saved with an Interview tag.
Interview notes can be used to record progress on a given date. These notes are not visible to students and can only be viewed by faculty, including the Project Coordinator and yourself as the Project Advisor. This setting can be changed so interview notes are visible to students, as shown below.
Interview Notes Visible to Students
If you would like Interview Notes to be visible to students, please ask an administrator to enable the sharing of Interview Notes via Settings > Security & Permission.